LEARN JAVASCRIPT
- Easy-to-follow VIDEO LESSONS on YouTube with Dr Abstract!
- Matching theory and reference sections at ZIM SKOOL
- ZIM SKOOL also features online code practice sections
- Inclusiveness and creativity for STUDENTS and TEACHERS
- View PROPS from excited learners and educators
- Supported by general ZIM LEARN video and code tutorials
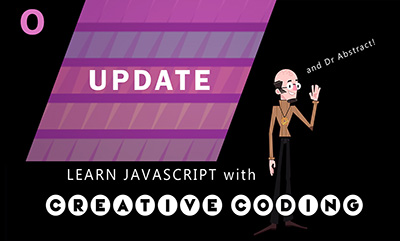
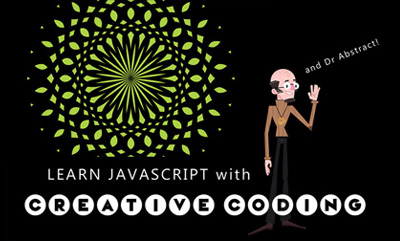
Here is an UPDATE VIDEO and INTRO VIDEO followed by the lessons to date. We hope you enjoy the wonder of creating and share with others.

- 0:01 - video intro screen and music
- 0:25 - set up code editor
- 5:28 - canvas template
- 7:40 - describing template
- 9:23 - code comments
- 9:47 - scaling the stage
- 12:10 - code syntax (constants, keywords, statements, operators, terminators)
- 14:24 - string and numbers
- 15:16 - colors
- 21:16 - var, const and let
- 23:05 - Frame (Framework)
- 28:30 - objects and classes (class is the instructions or recipe to make new objects)
- 30:27 - indenting in { }
Lesson 01 - VID 01 - Editor, Canvas Template and Code Basics

- 0:01 - video intro screen and music
- 0:26 - naming the videos VIDS not Lessons
- 1:02 - lesson 01 review (VIDS are part of Lessons)
- 3:55 - review of code template
- 5:07 - learning by seeing visual things!
- 6:02 - zog() and the Console!
- 11:35 - objects and properties
- 13:40 - const and let (ES6 replacements for var)
- 15:10 - ZIM Docs and ZIM Bits references
- 16:15 - put your code here! Finally coding!
- 16:50 - display Objects - something we see on stage
- 17:10 - making a button object from a Button class
- 20:00 - coordinates on the stage x and y and 0, 0
- 22:55 - centering on stage .center()
- 23:30 - setting parameters
- 28:10 - parameters versus arguments
- 29:13 - dot syntax, methods, properties
- 31:40 - chaining methods onto objects
- 34:25 - Blob for Kids apps - and conclusion!
Lesson 01 - VID 02 - Object Oriented Basics, Docs, Display Objects, Parameters and Chaining

- 0:01 - video intro screen and music
- 0:37 - review of earlier vids
- 1:04 - transformations - position, scale, rotation, skew
- 2:16 - coding review and setup
- 3:00 - registration point - important!
- 7:00 - rot() rotation and outline()
- 9:08 - sca() scale grows from registration
- 13:55 - centerReg() - sets registration in middle
- 17:15 - pos() - left, top, right, bottom
- 21:50 - traditional properties before chaining
- 26:10 - chaining - reducing code!
- 32:11 - ZIM Docs - to see more chainable methods
- 35:09 - Docs intro video and conclusion
Lesson 01 - VID 03 - Transformations, Registration and Properties

- 0:01 - video intro screen and music
- 0:41 - overview of lesson 2
- 1:23 - starting new page with template
- 2:20 - making a Slider
- 3:10 - parameters for Slider (in Docs)
- 5:25 - interactivity - getting value from slider
- 8:40 - currentValue property of slider
- 10:20 - slider value in console (F12)
- 10:55 - min, max, steps, vertical, useTicks
- 17:34 - literals and object literals
- 20:51 - properties in an object literal
- 21:40 - accessing properties (dot syntax)
- 23:08 - object literal as configuration object
- 25:02 - using a configuration object
- 27:49 - advantages of configuration objects
- 29:32 - conclusion
- 30:32 - new ending!
Lesson 02 - VID 04 - Components, Literals and Configuration objects

- 0:01 - video intro screen and music
- 0:20 - review of lesson 02 and where to practice
- 1:34 - review of last code with slider and the plan ahead
- 2:38 - loading in a picture asset (bitmap)
- 9:58 - setting the scale of the car with the slider
- 16:57 - scaling from the center (centerReg - the registration point)
- 18:00 - starting scale and the slider at the same value
- 21:23 - custom round button for the slider button
- 32:43 - final button and conclusion
Lesson 02 - VID 05 - Images and Controlling Properties with Custom Components

- 0:01 - video intro screen and music
- 0:13 - summary of last vids - third vid of Lesson 02
- 0:57 - animation discussion
- 1:18 - code review so far
- 1:40 - manual animation in time with a Ticker
- 3:49 - easing and the animate METHOD (said property for some reason)
- 4:39 - animating alpha
- 6:48 - animating position - and animating FROM not TO
- 8:10 - from parameter and using configuration object
- 13:27 - easing examples
- 14:53 - animating interface - rolling the button!
- 23:24 - animation is a feeling, not really to be seen
- 24:10 - the ANIMATE constant
- 26:30 - ZIM animate() examples
- 27:35 - shape animation example
- 27:47 - animation and wiggle along editable path example
- 28:20 - conclusion - this is FUN! Please share...
- 29:03 - dancing with Dr Abstract
Lesson 02 - VID 06 - Animation, Ticker and Path Animation

- 0:01 - video intro screen and music
- 0:38 - Baby, you can tune my car! with wiggle and sound
- 2:40 - review of last video code
- 3:20 - series and sequence - animating in Dials
- 5:18 - Tile of Dials
- 12:28 - Containers, bounds and registration
- 19:13 - sequence animation on Tile
- 26:27 - sequence and animation example page
- 28:39 - rewind and loop
- 30:58 - wiggle and wiggling car!
- 35:45 - conclusion - animation is fun!
- 36:14 - Dr Abstract dancing
Lesson 02 - VID 07 - Animation Series, Sequence and Wiggle
- 0:01 - video intro screen and music
- 0:13 - skool review!
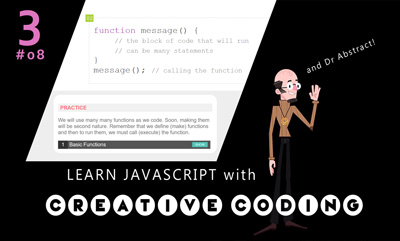
- 0:56 - Lesson 03 - functions & starting from a template
- 2:20 - making a basic function & defining parts
- 2:50 - reasons for a function
- 3:28 - add a Label for the function to operate on
- 4:33 - filling in the body of the function
- 5:16 - function will only run if called
- 5:42 - calling a function
- 6:56 - order of code with functions - and a stage.update()
- 7:50 - parameters and arguments
- 9:49 - variables and parameters
- 10:33 - ( ) are like a portal!
- 10:43 - scope - parameters only available inside function
- 12:04 - variable scope
- 15:24 - running a function more than once!
- 16:28 - hoisting - running a function before we declare it!
- 18:14 - revisit scope and global scope
- 20:36 - scope of let - save it for later
- 22:13 - passing TWO parameters (or more)
- 22:52 - concatenation - joining strings with +
- 25:09 - quotes within quotes - escaping with \
- 27:40 - returning a value from a function
- 30:36 - summary - functions, parameters
- 31:03 - ( ) as hands giving and receiving
- 31:32 - parameters for Label() - arguments usage
- 32:13 - more review - scope, hoisting, return
- 32:29 - next video and new Dance Video!
Lesson 03 - VID 08 - Functions, Parameters, Scope

- 0:01 - video intro screen and music
- 0:12 - summary of last vids on Functions
- 1:09 - lesson03.html file with function greet and review
- 1:30 - function literal or anonymous function format
- 2:26 - functions are objects in JavaScript
- 3:08 - storing function in constant or variable
- 4:00 - running a function literal
- 4:30 - storing function literals in object literal
- 8:00 - calling a function literal when we finish animating
- 10:30 - calling a named function when done animating
- 15:02 - other calls, timeout, events, etc. can call functions
- 15:43 - arrow function in JavaScript 6
- 17:15 - calling an arrow function when done animating
- 17:52 - collecting parameters with arrow functions
- 18:34 - removing ( ) if only one parameter for arrow function
- 21:50 - templating in JavaScript - embed variables in quotes like PHP
- 24:25 - summary of anonymous and arrow functions
- 25:19 - libraries are built by storing functions on objects (namespaces)
- 27:06 - binge watching and dancing interlude!
Lesson 03 - VID 09 - Function Literals / Anonymous Functions and Arrow Functions

- 0:01 - video intro screen and music
- 0:13 - Lesson 03 Function review so far
- 1:30 - tidying up the function example getting ready for events
- 2:52 - introductions to events
- 3:30 - the on( ) method for capturing events - click, etc.
- 4:08 - adding the arrow function to on method as second parameter
- 4:43 - Atom shortcut for arrow function (af)
- 5:05 - adding function body to event handler function
- 6:52 - adding pointer cursor rather than default cursor
- 7:36 - addEventListener() for events for the DOM
- 8:42 - the event object - often the parameter e
- 10:10 - the target of the event object (e.target)
- 12:36 - the "mousedown" event
- 13:00 - the ugly "DOMContentLoaded" in DOM JavaScript
- 14:30 - back to mousedown
- 14:50 - mouseover, mouseout and mousemove
- 15:59 - drag() and pressup
- 16:30 - pressmove (note, NOT pressdrag)
- 17:32 - Frame's "ready" event and review of on() parameters
- 18:32 - functions within functions
- 19:18 - keydown event
- 20:00 - the event object's keyCode - e.keyCode() and how to get them
- 20:30 - seeing keyCodes in the console - arrows, enter key, etc.
- 21:50 - deleting an object with the delete key
- 22:50 - arrow keys, MotionController, issues with keydown
- 24:12 - events on a Container - using a Tile
- 26:14 - the on() method should not be chained
- 29:01 - short chainable methods - tap() and change()
- 29:50 - using e.target on a container gets child!
- 30:40 - one hundred monsters!
- 31:07 - adding a tap() to the tile container
- 32:17 - event object's currentTarget - owner of event
- 33:31 - dragging a container drags child (the target)
- 34:01 - dragging all the container - use drag({all:true});
- 34:50 - conclusion and little relax! Dancing interlude
Lesson 03 - VID 10 - Events, Event Objects and Targets

- 0:01 - video intro screen and music
- 0:14 - summary of last lessons
- 1:30 - abstraction and abstract art
- 2:30 - Creativity Framework - reviews
- 3:44 - context and content
- 4:38 - a medium - sits between
- 5:33 - hierarchy - and bosses bosses...
- 6:45 - terms of a hierarchy - nodes, etc.
- 8:08 - siblings, parents, children, sub and super...
- 10:06 - organization and mapping of hierarchy
- 10:35 - drawers - sections or boxes - Web page wireframe
- 11:23 - add angle brackets to top and bottom - XML or HTML
- 12:00 - indented list / table of contents with same data
- 12:50 - indenting code represents boxes / functions - organization!
- 14:07 - directory tree for folders and files - store a hierarchy
- 15:00 - nested or multidimensional arrays - store a hierarchy
- 15:55 - the traditional hierarchy drawn from nested boxes!
- 17:16 - letters and delimiters in formation - INFORMATION!
- 17:59 - code and language - linear to hierarchy
- 18:49 - a tree and the round things for trunks and branches
- 19:33 - nests, cells and organs - we are organizing!!
- 20:03 - code for cells is DNA - chemical delimited (said comma... oops)
- 20:45 - node zero in middle - radial hierarchy (mind map)
- 20:27 - our brain - axons and dendrites 3D hierarchy
- 21:47 - at any given time... a single hierarchy - our consciousness
- 22:50 - mapping of hierarchies - organization summary
- 23:18 - chaos and the big hug
- 23:24 - e-learning app made with JavaScript (ZIM) to recreate diagram
- 24:12 - multiuser version
- 24:40 - isomorphism of hierarchy e-learning app
- 25:50 - MISTAKE - can you see it? Oops.
- 26:40 - composition (and) parts - reality
- 27:05 - classification (ors) types - theory
- 28:05 - flexibility of hierarchy
- 28:25 - composition... things move!
- 28:53 - classification... different contexts...
- 29:33 - only context - empty and described
- 29:49 - all content in me... directly under node zero
- 30:20 - relativity and Einstein...
- 30:50 - conclusion and relevance to coding
- 31:00 - we are philosophers modeling life
- 31:27 - the philosophy of Nodism!
- 31:53 - mobile mediated app TOUCHY vid
- 32:52 - mediated reality / mobile mediated app
Lesson 04 - VID 11 - Abstraction, Hierarchy and Creativity Framework

- 0:01 - video intro screen and music
- 0:13 - Lesson 04 review
- 0:44 - abstraction summary
- 1:00 - watch out for an upside-down hierarchy
- 1:33 - the plan - abstract to constants, functions and classes
- 1:48 - starting our code for lesson04
- 2:13 - Createjs and ZIM are abstractions
- 3:23 - Teacher not prepared?
- 3:39 - starting with making pupils!
- 4:17 - wearing a little hat
- 4:50 - making a classroom - adding pupil to container
- 7:02 - efficiency by abstracting to a variable or constant
- 7:25 - embarrassed students
- 8:07 - single variable - changing color to yellow
- 8:45 - variables act as a convenience
- 9:12 - taking repeated code and making it a function
- 10:00 - function makePerson()
- 11:11 - returning an object from the function
- 12:14 - numbering things often means you can abstract
- 12:49 - don't use variables from outside the function
- 13:22 - using parameters to send information to the function
- 14:27 - specific and general (abstract)
- 14:57 - classes as an abstraction
- 15:35 - a class is what objects are made from
- 16:14 - a class is a metaphorical overlay in OOP
- 17:08 - using class keyword and extends
- 18:02 - contstructor runs when making a new Person
- 18:42 - parameters go in the constructor
- 18:46 - the keyword, this - new Person() is this inside class.
- 19:45 - object and class, class and object
- 20:00 - most at this level don't work with custom classes ;-)
- 20:40 - calling the super constructor
- 20:56 - inheritance
- 22:12 - a class or classroom - a group with things in common - a class
- 22:58 - next lesson is loops for more efficiencies!
- 23:23 - last view of Touchy game on Dragon's Den and in clubs
- 24:09 - creative coding also goes beyond visual creation!
Lesson 04 - VID 12 - Abstracting to Constants / Variables, Functions and Classes
- 0:01 - video intro screen and music
- 0:15 - previous lesson summary
- 1:57 - starting code page for Lesson 05
- 2:44 - an Array - a data structure that holds a list
- 3:05 - Array literal - and review of JavaScript literals
- 4:10 - storing array in constant and logging array
- 4:43 - accessing array elements with array access operator
- 5:18 - index number starting at 0
- 5:44 - length property is total number of elements
- 6:00 - logging elements of array - index practice!
- 6:43 - logging last element of array
- 8:10 - assigning a value at an index in the array
- 9:11 - making an array of colors!
- 10:11 - changing a circle color with color from array
- 11:02 - getting a random element of array with Math.random()
- 13:57 - Math.round() and Math.floor() - also Math.ceil()
- 16:33 - ZIM rand() to get range of whole numbers
- 18:40 - ZIM shuffle() to shuffle array and get first element
- 21:05 - ZIM Tile() to tile colored circles
- 22:05 - ZIM VEE value to pass an array for random picks!
- 22:52 - ZIM series() to get colors in order
- 23:52 - Array literals versus Object literals
- 24:55 - arrays store similar things
- 25:16 - objects store different things (different properties)
- 26:24 - an array of different things - but what are they?
- 27:49 - an array of monsters!
- 28:16 - accessing properties of an object stored in an array
- 29:48 - multidimensional arrays - arrays within arrays!
- 30:42 - accessing elements in a multidimensional array
- 32:44 - a multidimensional video conclusion - Trippy!
Lesson 05 - VID 13 - Arrays and Accessing Elements, Comparison to Object Literals

- 0:01 - video intro screen and music
- 0:18 - brief look at last array video
- 1:35 - into the code
- 2:00 - making a candies array and adding an element
- 3:15 - the push() method to add to the end of an array
- 4:49 - the pop() method to remove (and return) last element of array
- 6:05 - the shift() method to remove (and return) from the start
- 7:07 - the unshift() method to add to the start of an array (lollipop!)
- 8:19 - story of push, pop, shift and unshift
- 9:15 - split() method of a String to make an array
- 10:58 - the join() of an array - makes a string
- 11:39 - the indexOf() method to find index of element
- 13:18 - the splice() method to insert or delete from middle
- 17:20 - deleting an element with splice()
- 18:08 - assignment makes a reference to the SAME array
- 19:36 - using the slice() method to make a (shallow) copy of array
- 20:23 - ZIM copy() for (deep) arrays or objects
- 21:30 - the reverse() method to change the array to reverse order
- 22:22 - the sort() method - to sort by default string
- 23:53 - the concat() method to make a new array from two arrays
- 25:47 - conclusion and exit video!
Lesson 05 - VID 14 - Array Methods

- 0:01 - video intro screen and music
- 0:14 - last vid summary on Arrays
- 0:50 - what is a loop
- 1:20 - last code - spelling lollipop wrong - sigh
- 2:42 - general format of a for () {} loop
- 3:57 - comparison of structure to function and conditional
- 5:00 - parts of the loop - starting at 0
- 5:50 - logging results of for loop
- 6:10 - ZIM world domination
- 6:33 - parts described again
- 7:33 - looping backwards
- 8:30 - increment operators ++, --, +=, etc.
- 9:00 - post and pre incrementing
- 12:40 - looping by 2 or any other number
- 12:54 - using continue to skip to next loop
- 14:11 - using break to leave the loop
- 14:50 - nested loop - i and j, and name of iterator
- 16:42 - looping through an array
- 17:22 - using the length of the array to determine loop
- 18:14 - accessing elements of array with loop number
- 19:01 - explaining how the index number works
- 20:08 - hard-coding instead of looping - not for 1000 loops!
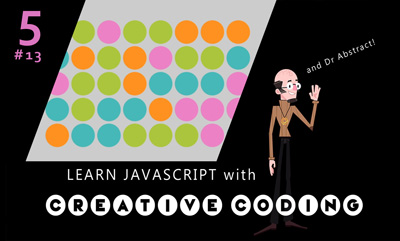
- 20:50 - creating Display Objects in a loop
- 23:10 - positioning objects with i to shift each object like a tile
- 24:56 - looping through a colors array to color objects
- 27:00 - the modulus % operator to get remainder
- 29:50 - using the modulus to cycle through array in loop
- 31:28 - conclusion and closing video - looped rings!
Lesson 05 - VID 15 - Basic Loops, looping through Arrays and Modulus

- 0:01 - video intro screen and music
- 0:05 - past lesson summary
- 2:21 - while loop format (ES6 loop mentions too)
- 5:23 - ZIM loop
- 6:45 - loop matches format of events, timeout, interval
- 9:35 - looping backwards with third parameter true
- 9:54 - loop backwards when removing from array or container
- 10:50 - looping through an array with a ZIM loop
- 11:57 - looping through an object literal
- 13:31 - getting index and total in ZIM loop
- 14:32 - looping through Container - creating our Container
- 16:23 - containers have a loop method - other loops are functions
- 17:36 - format for using loop method
- 19:54 - removing from container in a loop
- 22:00 - the equivalent of continue with a ZIM loop is return
- 25:47 - the equivalent of break with a ZIM loop is return a value
- 28:07 - making art with a loop - random circles on stage
- 30:54 - animating scale in a loop
- 33:21 - conclusion and trippy vid
Lesson 05 - VID 16 - While Loop and ZIM Loop for Numbers, Arrays, Objects and Containers

- 0:01 - video intro screen and music
- 0:13 - lesson review
- 0:45 - the basics and soon creative coding with building and controls
- 2:00 - getting template for Lesson 06
- 2:23 - CreateJS and ZIM have 3000 to 5000 conditionals!
- 2:47 - the structure of an if statement if () {}
- 3:09 - else and if else
- 3:50 - inside the round brackets is a statement
- 4:00 - things that evaluate to true and false
- 4:46 - is a new Circle() true? yes
- 5:05 - Boolean operators (less than, greater than, etc.)
- 5:16 - testing x values (btw - an equal to is == NOT =)
- 5:37 - using conditionals to make Rectangle and Circle objects
- 6:50 - Boolean or (||) and and (&&) operators and brackets
- 8:38 - odds and testing random numbers
- 10:34 - sneezing and Bugles dust!
- 11:05 - using interval to test random in time
- 13:53 - animating to make an odds factory!
- 16:58 - dynamically changing odds
- 17:16 - conditional concepts and examples
- 18:40 - controlling odds with slider
- 21:39 - the factory to make circles and rectangles!
- 23:46 - conclusion and new closing video for Droner!
- 24:24 - cameo by Pragma in Pink...
Lesson 06 - VID 17 - Conditionals - if Statements, Booleans and Odds

- 0:01 - video intro screen and music
- 0:15 - review of last lessons and places to practice
- 2:22 - review of last lesson - the assembly line!
- 2:58 - the == operator for equality
- 3:52 - the else if () {} revisited
- 5:02 - the embarrassed triangle
- 5:47 - the != not equal operator
- 7:20 - debugging - a build test example!
- 8:23 - demonstration of the build test
- 9:29 - history of the word bug
- 10:58 - missing comma - white screen of wonder
- 11:13 - F12 to see console with error messages (tab to console)
- 11:47 - missing a bracket? Wrong line wrong error?
- 12:15 - missing a : colon - and words used...
- 12:50 - lowercase class name - not defined
- 13:14 - do not name variable the same as the class
- 13:40 - lexical declaration... Oxford error!
- 14:14 - missing brackets - can be tricky
- 15:45 - undo to when it was working / test often!
- 16:30 - no error - but something is missing
- 16:58 - make sure the function is being called!
- 19:04 - undefined values - watch scope
- 23:45 - proper scope example summarized
- 25:00 - something not showing up? Add to stage!
- 26:22 - examples of bugs in ZIM Skool
- 27:30 - the five minute rule - working on right file!
- 28:34 - ZIM Tips - for helpful debugging tips
- 28:44 - errors, missing, indenting, zog, ask & changes
- 29:32 - types of errors
- 29:37 - simplify! comment out code or isolate code
- 30:19 - make sure the file is saved!
- 30:52 - hitTest errors or too many results
- 31:28 - why things might not show up!
- 31:39 - why indenting can help you understand code
- 32:24 - be messy in the real world - but not with indenting!
- 32:48 - conclusion and look forward to building
- 33:05 - Droner video end video
Lesson 06 - VID 18 - Equality and Not operators and Debugging and Error Messages

- 0:01 - video intro screen and music
- 0:17 - lessons review - now on Lesson 07
- 1:03 - showing the intro app that we will build
- 1:30 - intro demo
- 3:28 - templates - minimal, fit, outside, full, tag, assets
- 6:36 - template for Adobe Animate (Flash) called ZIM Shim
- 7:07 - setting up the fit template for Lesson07
- 7:38 - quick template review
- 9:26 - Coding! Making background from Rectangles
- 10:30 - ZIM colors
- 12:40 - using pos(x,y,horizontal,vertical,container)
- 13:52 - reminder of registration point and outline()
- 14:40 - making a Tile instead!
- 16:10 - randomizing colors with array and ZIM VEE (Pick)
- 16:55 - ZIM VEE (Pick) series() to get colors in order
- 19:29 - Using Container objects - theory
- 20:45 - making a Container for the first section
- 21:28 - two types of containers - dimensioned and flexible
- 21:55 - setting dimensions on containers
- 22:38 - outlining container (shows our container dimensions are wrong!)
- 24:08 - centering the Circle in the container!
- 25:27 - dragging the circle in a Boundary
- 28:18 - checking the boundary... the registration point stays inside
- 28:56 - adjusting the boundary to accommodate the radius
- 30:58 - adding the Label text
- 32:23 - using STYLE to set the color of all the Label objects
- 33:26 - no semi-colon at end (not CSS) we use commas
- 33:58 - setting the alpha with STYLE
- 34:48 - setting a general style for everything
- 35:45 - setting styles for a Circle
- 36:15 - overriding styles
- 36:44 - purple in the circle!
- 36:50 - conclusion and "hanging" around with new Vid! (loud)
Lesson 07 - VID 19 - Building an Intro App panels, Draggable Circle, Labels and STYLE

- 0:01 - video intro screen and music
- 0:10 - the Learn JavaScript interactive promo!
- 0:29 - summary of intro app - we are building components
- 1:30 - summary of the code so far
- 1:55 - creating headings for parts
- 2:55 - starting in on new code with a Container
- 3:45 - making a Dial
- 4:12 - adding dial to container
- 5:55 - using place() to place objects
- 7:37 - making a Slider
- 8:42 - change events
- 9:19 - difference between on("change") and change()
- 10:40 - the currentValue property (and e.target review)
- 12:48 - OPTIMIZE setting to not let components update the stage
- 14:00 - applying change event to slider
- 16:15 - dial parameter discussion
- 16:38 - useTicks and step parameters for Slider (or Dial)
- 18:00 - creating a ColorPicker
- 19:08 - change and close events of ColorPicker
- 21:12 - making a Button
- 22:34 - changing color of Button with ColorPicker
- 23:50 - removing the alphaPicker from the ColorPicker
- 24:20 - adding tap() to Button (like an on("click"))
- 26:40 - adding Label for Components
- 27:46 - checking the alpha STYLE
- 28:06 - we're a Designer - let's go on break...
- 28:49 - conclusion and wearable computer vid!
- 30:03 - reference to Hamilton SuperCrawl with Hangy
Lesson 07 - VID 20 - Building Components - Dial, Slider, Button, ColorPicker

- 0:01 - video intro screen and music
- 0:15 - summary of lessons so far
- 0:30 - summary of intro app we are building!
- 0:50 - view of animations for sections
- 1:27 - review of code so far
- 1:45 - making a Squiggle in a Container
- 3:20 - testing the squiggle in a browser
- 3:28 - configuring the squiggle
- 4:34 - making a Triangle to move along the path
- 6:29 - dragging the triangle on the path!
- 7:04 - drag and animate along a path
- 8:36 - adding the Label
- 10:40 - using expand() to increase interactive size
- 11:55 - animating in the containers
- 15:42 - ZIM animate series
- 16:30 - demonstration site of different animations
- 17:50 - using ZIM DUO config object to get to wait parameter
- 20:50 - putting animateTime in a variable or constant
- 22:20 - animating FROM - more efficient at times
- 25:26 - the ANIMATE constant to turn off animations
- 28:34 - conclusion
- 29:25 - Hangy video - still loud!! We'll get it next time
- 30:28 - description of how Hangy works
Lesson 07 - VID 21 - Animating and Dragging on Path, Animating Sections

- 0:01 - video intro screen and music
- 0:15 - summary of last vids - app summary
- 1:13 - summary of the code so far including ANIMATE = false
- 1:58 - making a Tile in a const pixels
- 3:03 - making a Container to hold part 4
- 4:52 - adding a Border to the rectangles
- 5:10 - randomizing colors
- 5:35 - moving tiles up 20 pixels
- 5:58 - making eraser Rectangle
- 6:48 - shadow - and positioning based on x property
- 7:27 - dragging the eraser - and drag story!
- 8:26 - pressmove event as we are dragging
- 8:56 - logging to test event is working F12 for console
- 9:43 - hit test between eraser and each pixel in loop
- 10:20 - using a conditional (if) for hit test
- 10:47 - removing a pixel - and looping backwards!!!
- 12:26 - setting loop to loop backwards
- 13:48 - animating pixels rather than removing pixels
- 15:02 - not working because ANIMATE is false!
- 15:57 - setting ANIMATE to true to see animations ;-)
- 16:33 - adding instruction labels
- 18:18 - using JavaScript toUpperCase() method right on String
- 19:30 - animating sections in - grouping animations together
- 20:00 - using SHIFT TAB to outdent all the selection
- 21:00 - repeated code can be abstracted to loop - let's practice!
- 21:38 - preparing to Abstract - and finding the differences
- 22:00 - using a Container... or add objects to an Array [ ]
- 23:09 - looping through array
- 23:54 - functions versus methods
- 24:37 - we did not add a loop method to the JS Array class (bad form)
- 25:10 - back to Abstraction - how Abstraction works
- 26:10 - collecting the index number and using it in Abstraction
- 26:52 - comparing before and after Abstraction - saved half the code!
- 28:32 - loading the logo asset in to the Canvas
- 30:30 - animating the logo asset in with alpha and rotation
- 32:05 - oops - need to center the registration point!
- 32:47 - adding a link to the logo icon on a tap event
- 33:55 - conclusion - JS talk - final video with volume down!
- 35:22 - stories of Hangy
- 36:16 - Lesson 07 wrap up - see Code in Five Minutes and Explore series!
Lesson 07 - VID 22 - Building Tiles, Looping, Hit Test and Animating

- 0:01 - video intro screen and music
- 0:14 - summary of last lessons
- 2:13 - summary of the controls lesson
- 2:55 - docs for controls
- 4:55 - Parallax examples!
- 5:07 - ZIM Bits - parallax image example
- 5:36 - Gorgolon - Window scroll example
- 6:28 - Scroller (Flintstone) - with Parallax
- 7:02 - dancing aliens with mouse parallax and wiggle
- 8:13 - parallax site - most advanced and complete ZIM VR
- 9:13 - scrollbar parallax - Holiday Card
- 9:58 - basic scrollbar and mouse Parallax example
- 10:55 - getting a template to code!
- 11:40 - bringing in image assets
- 12:57 - new Waiter() or new ProgressBar() info
- 13:24 - adding the asset to the stage
- 13:49 - viewing asset - thanks Frank Force
- 15:00 - version number updates eg. ZIM 10.6.1
- 15:54 - only need asset() now... not frame.asset()
- 16:36 - comparison of HTML img and asset()
- 17:03 - making midground and foreground assets
- 18:04 - setting alpha and blendmode
- 18:27 - canvas compositeOperation or blendMode info
- 19:45 - viewing effect of blendmode soft-light...
- 20:16 - concept of parallax - the plan
- 20:49 - the Parallax class - and a new parallax object
- 21:30 - using an array [ ] to store a list of similar things
- 22:00 - using an object literal { } to store properties of a layer
- 22:40 - creating the background layer object for parallax
- 23:47 - seeing the background moving with mouse x
- 24:10 - moving too much!
- 24:25 - making it move just the right amount
- 25:00 - copying in atom by sitting on line and CTRL C CTRL V
- 25:20 - setting parallax in y
- 25:38 - adjusting x to y or horizontal to vertical - easy to do!
- 26:18 - changing y based on an input of mouseY
- 26:30 - mouseY acts from the bottom - in this case set split:true
- 27:23 - testing the split - it works
- 27:50 - copy the background to the mid and foreground
- 28:28 - multiple select in Atom with the CTRL key pressed
- 29:16 - setting the damping to slower! .01 rather than .1
- 30:00 - ooo - parallax complete!!! Looks better in real life
- 30:22 - fit, full and outside mode
- 31:12 - when would we use the outside mode?
- 31:43 - full screen parallax (looks great live without screen capture compression)
- 32:13 - why we learned the basics - creative coding!
- 32:26 - new outro video - sound controlled lights
- 32:39 - animating with sound - is a control too!
Lesson 08 - VID 23 - Loading Images and Applying Parallax Controls

- 0:01 - video intro screen and music
- 0:12 - summary of lessons so far
- 0:38 - intro to the Ticker!
- 1:19 - grabbing the template
- 1:38 - ready to code!
- 1:51 - Ticker.add() and static methods - Math class
- 2:30 - Ticker description - frames per second
- 3:12 - adding a function to the Ticker
- 3:28 - timeout, interval, loop and Ticker comparison
- 4:58 - showing console log from a Ticker
- 5:18 - animating a Circle in a Ticker
- 5:42 - using +, +=, ++, -=
- 7:09 - adding bounds to motion animation
- 8:48 - watching ball bounce!
- 9:00 - making circle follow the mouse - frame.mouseX
- 9:33 - making movement smoother with damping
- 10:46 - ZIM Damp class and converting with the damp object
- 11:30 - seeing the damping - smooth!
- 11:42 - slowing down the damping from .1 to .01
- 12:35 - moving and damping in the y as well!
- 13:13 - something broken at 13:13
- 13:34 - working again!
- 13:38 - leaving a trail that follows the mouse
- 15:19 - seeing the trail
- 15:38 - setting the alpha lower
- 16:00 - discussion of redrawing circles - blitting description
- 17:06 - animating the tail to go away
- 15:50 - removing the circle when the animation is done (call)
- 18:34 - seeing the animation out
- 19:23 - experimenting with the settings to make art!
- 19:51 - results of creative coding!
- 20:14 - animating color - object literal format reminder
- 21:00 - adjusting colors
- 21:43 - final mouse follow example
- 22:03 - MotionController - var a variety of control
- 23:35 - mousedown, mousemove, keydown
- 24:56 - examples of MotionController - Butterfly
- 25:51 - controlling a ZIM Pen with the pressmove
- 26:26 - making a Pen
- 26:40 - ZIM controls work on existing display objects
- 27:42 - seeing the Pen work!
- 28:02 - seeing the Gen-Pen example - splatter, city, grass, etc.
- 28:44 - working with layers in Gen-Pen
- 29:25 - Gen Art on ZIM banner page
- 29:47 - conclusion and looking forward!
- 30:29 - outro video made with SoundWave controls
Lesson 08 - VID 24 - Ticker, MotionController, Pen

- 0:01 - video intro screen and music
- 0:16 - lesson review
- 0:48 - intro to Sprite, Dynamo, Scroller, and Accelerator
- 1:47 - grabbing a template
- 2:25 - bring in assets with Asset List tool!
- 3:20 - warning about ES6 and IE - use a tool like Babel
- 4:15 - using CTRL and arrow key in Atom to move line up and down
- 4:25 - looking at the assets
- 4:40 - a SpriteSheet - images in a graphic for animation
- 5:03 - a look at JSON, Texture Packer, animation information
- 5:44 - types of SpriteSheets - regular spacing does not need JSON
- 6:28 - exporting to EaselJS (CreateJS) from TexturePacker
- 6:48 - describing JSON - JavaScript Object Notation
- 7:30 - ZIMON - to store any ZIM Object as a string!
- 8:38 - JSON stringify() and parse()
- 9:04 - loading assets and path into Frame
- 9:30 - showing an asset - copy and paste names!
- 10:15 - asset showing in Browser
- 10:26 - adding asset to a Scroller with a speed
- 11:02 - asset scrolling on screen - and explanation
- 11:54 - changing the speed of the scroller
- 12:06 - making all the scrollers
- 13:26 - adjusting heights and size of Frame
- 14:45 - all the scrollers working!
- 15:11 - adding a Sprite
- 17:00 - running the sprite
- 17:15 - running an animation at a label
- 17:34 - looping the sprite
- 18:00 - moving sprite and changing layer
- 18:26 - sprite looking good!
- 18:36 - changing the sprite speed with time
- 19:41 - adding sprite to Dynamo to adjust speed dynamically!
- 21:48 - percentSpeed discussion for Dynamo and Scroller
- 22:13 - an Accelerator can dynamically change the percentSpeed
- 22:24 - moving backwards - reversible and flip
- 23:40 - adding everything to an Accelerator
- 24:03 - using an Array [ ] to pass objects to the accelerator
- 24:50 - adding statements to array and switch to commas
- 25:08 - using CTRL select for multiple editing in Atom
- 25:50 - playing scene at 100 percent in accelerator
- 26:02 - the magic... changing the speed of the whole scene
- 27:11 - discussion of how to change speed based on mouse
- 27:38 - Proportion, ProportionDamp, JavaScript map()
- 28:28 - MotionController to control speed!
- 31:02 - the results of the MotionController - cool!
- 31:23 - registration point issue
- 31:48 - adjusting speed of MotionController to flip better
- 32:41 - yay - nice speed change - all is good!
- 35:02 - switching to a keydown motion (or a gamePad)
- 35:50 - results of using keyboard!
- 34:00 - summary - comparison to other frameworks
- 34:57 - creative coding with gaming aspects!
- 35:27 - oo oo - the end video
- 35:43 - singing da da ba doo around the world
Lesson 08 - VID 25 - Sprites, SpriteSheets and Scrollers

- 0:01 - video intro screen and music
- 0:14 - summary of last lessons
- 0:44 - the Pages class to go from page to page
- 0:59 - looking ahead to Layout class and others
- 1:23 - grabbing the minimal template
- 2:01 - adding the stageW and and stageH constants
- 2:18 - pages are just Containers that we can add and remove
- 2:42 - making two containers and swapping them
- 3:08 - making a background color with a Rectangle
- 3:43 - adding rectangle to page1 container!
- 4:02 - adding an arrow button - or just a Triangle with hov()
- 5:26 - looking at the page in the Browser
- 5:44 - using chainable tap() - like an on("click"...) event
- 6:05 - making a page2 - watch the tab indenting
- 6:44 - removing page1 and adding page2 in tap
- 7:34 - do not start with page2 added to stage
- 7:55 - testing clicking from one page to the next
- 8:08 - Swipe object discussion would need more code...
- 9:26 - discussion of animation - so more and more...
- 9:40 - preparing for using the Pages class
- 10:38 - storing buttons on the page object
- 11:05 - difference between constants and properties
- 11:31 - JavaScript has dynamic classes/objects
- 12:10 - issues with dynamic classes
- 12:26 - making a new Pages object
- 12:43 - using an Array to specify the list of pages
- 13:06 - making the pages objects
- 13:28 - an array of Swipes - where are the pages we swipe to?
- 13:54 - making a third page... talk of automation
- 14:30 - discussion of keeping nav separate from page
- 14:58 - specifying pages for swiping
- 15:34 - swiping up and down to a help message
- 16:15 - swiping up and down to different structures...
- 16:45 - setting up swiping for other pages
- 17:21 - ADDING the Pages object to the stage
- 18:00 - adding transition (lots of types) between pages
- 18:52 - live swiping of pages!
- 19:05 - making buttons work with HotSpots!
- 19:43 - using an Array to pass in multiple hot spots
- 19:52 - theory for using hotSpots - Model View Controller
- 21:10 - hotSpots are like an image map in HTML
- 22:13 - making the hotSpots objects with the page and the rect
- 22:49 - the callback function for clicking on the hotSpot
- 23:12 - using the go() method and other pages features
- 24:22 - testing the button to change the page!
- 24:57 - making the other arrows work
- 25:40 - easy to see we could build in a loop
- 26:08 - testing all the buttons! Yay!
- 26:18 - swiping up and down and various events
- 26:48 - capturing our custom help event
- 27:12 - making a new Pane (pop-up window)
- 28:10 - calling the pane and testing
- 28:27 - setting up a different help for different pages
- 28:52 - setting names for the pages
- 30:36 - changing the words in the pane
- 31:00 - accessing the page in the event
- 31:30 - seeing the different messages
- 32:52 - adding content to pages (with oops)
- 32:58 - adding a Tile to page1
- 33:28 - adding a RadialMenu to page2
- 33:44 - adding a Slider to page3
- 33:54 - discussion of separating view in another file
- 34:17 - can't see content? Debugging...
- 35:11 - solution - move objects in front of backing rectangles!
- 35:48 - yay - the working pages with content
- 36:14 - conclusion and ending video!
- 36:35 - next video on Layout class
Lesson 08 - VID 26 - Going from Page to Page, Swiping and HotSpots

- 0:01 - video intro screen and music
- 0:13 - review of last lessons
- 0:37 - introduction to the Layout class
- 1:00 - demonstration - responsive and adaptive layout
- 1:26 - the bounds to show the regions of the layout
- 1:47 - Grid and Guide example - P key for pixel/percentage
- 2:38 - grabbing the minimal template (with stageW and stageH)
- 3:10 - reminder of what the fit scaling mode gives us
- 3:40 - using full scaling mode to not waste space on mobile
- 4:06 - manually scaling and positioning
- 4:39 - using a resize event on the frame to reposition
- 5:14 - scaling an object using scaleTo() with percent on resize
- 6:05 - positioning based on percentage
- 6:38 - updating stageW and stageH in resize event
- 7:35 - using a Grid to see percentage
- 7:49 - resizing the Grid - and Guides, Layouts, etc.
- 8:33 - seeing percentage on the grid as stage changes
- 9:07 - talking percentages - .2 is 20%
- 9:40 - the Layout class distributes regions with margins, widths, etc.
- 10:20 - making containers for regions
- 10:27 - keep aspect ratios within regions - we scale, but not stretch!
- 11:20 - giving the container a size and add them to the stage
- 11:43 - adding a Pad to the left region - discussion of padding
- 12:39 - seeing the pad on the screen
- 12:55 - making the middle container for our content
- 12:28 - making a title
- 13:48 - discussion of Flexive design - Adobe, FlexBox discussion
- 14:58 - the most complicated code in ZIM to handle flex design
- 16:07 - using scaleTo() to scale label to content container
- 17:27 - outlining the content area with outline();
- 17:49 - making the right side with a ColorPicker
- 20:03 - seeing the color picker
- 20:26 - making the Layout object on the stage
- 20:55 - using an Array [ ] to pass in the regions as object literals { }
- 21:30 - making the region objects
- 22:20 - different properties for different orientation
- 22:38 - align, minWidth percentage, maxHeight percentage, etc.
- 24:32 - more layout params - lastMargin, backgroundColor, vertical
- 25:33 - the bounding shape parameter
- 26:08 - viewing the results of the Layout!
- 26:29 - resizing the layout in the resize event
- 26:43 - results of resize - and hiding bounding box
- 26:55 - discussion of layout on mobile
- 27:52 - squeezing Layout (and it is the right region not left!)
- 28:20 - the ResizeManager for multiple resizes in one!
- 29:10 - adding the layout to the resize manager
- 29:46 - resizing the resize manager
- 30:23 - conclusion - responsive, percentages, arrays, objects, etc.
- 31:30 - ending video - da do da dee da doo da doo!
- 31:43 - look ahead to more visual controls!
- 32:14 - come join us on Slack - we are REAL people!
Lesson 08 - VID 27 - Responsive and Adaptive Layout on Canvas

- 0:01 - video intro screen and music
- 0:18 - making art with noise!
- 0:24 - noise examples
- 0:45 - noise description - it is an equation with inputs
- 1:10 - moving along the equation
- 1:20 - how zoomed in we are in the equation
- 1:52 - example of zooming in and out - how many bumps we see
- 2:34 - blobs - we can add more dimensions to noise
- 2:47 - a cross section across mountains
- 3:04 - conventional view of noise - little specks
- 3:48 - getting started with a template (minimal today)
- 4:23 - the plan - apply noise to a tile and animate in a Ticker
- 5:07 - making the Tile of white Rectangle objects - on dark background
- 5:42 - centerReg - and discussion of registration and scaling
- 6:30 - seeing the tile in Browser
- 6:40 - making a Noise object and discussion of seeds
- 7:16 - making the same mountain based on a single little seed!
- 7:46 - looping to apply noise equation to each rectangle in the tile
- 8:22 - collect the index number so we can move along the noise equation
- 8:38 - setting the scale of the rectangles
- 8:54 - the noise equation - simplex (open source) vs perlin (closed)
- 9:12 - 2D equation - two numbers - "where" and "zoom"
- 10:10 - seeing the result - the height is between -1 and 1
- 10:28 - amplifying the noise
- 10:46 - zooming in on noise equation for smooth line
- 11:25 - we want to see the equation move!!!
- 11:34 - testing the seed number before we see it move
- 11:56 - seeing a zoomed out view with a specific seed
- 12:15 - refreshing, we see the same pattern - until we change the seed
- 12:54 - changing -1 to 1 results to 0 to 1 (add 1 and divide by 2)
- 14:20 - oops - we needed to centerReg the Rectangles!!
- 15:10 - view of 0-1 range - nice!
- 15:57 - separating the code into multiple lines
- 16:51 - separating out the values we will dynamically change
- 17:44 - applying a base value (min starting scale)
- 18:28 - how do we know to do all this? Experience...
- 19:17 - discussion of using a dial or slider to change values
- 19:40 - exploring the bounds of the numbers - what change does
- 20:28 - the range of x will dictate how fast we move
- 21:05 - how much we are zoomed in
- 22:20 - we have a starting range - discussion of proportion (mapping)
- 23:18 - making a MotionController
- 23:52 - adding a Circle to see where the MotionController is operating
- 24:48 - moving the circle with mousemove
- 25:22 - using the x and y of the circle to control the noise
- 26:22 - using a Ticker to constantly change
- 27:15 - demonstrating the x value changing
- 27:35 - converting range of 0-stageW to our desired ranges
- 29:10 - the proportion / mapping equation
- 29:30 - the ZIM Proportion class
- 30:17 - converting the circle's x with the proportion object
- 30:58 - seeing the results of the conversion
- 30:48 - using the conversion to control the noise!
- 32:05 - copying the Proportion for the y
- 32:45 - summary of the noise code so far!
- 33:05 - testing it in the Browser
- 33:22 - ooo - smooth motion
- 33:36 - too much jiggly - and a bit too quick!
- 33:56 - making adjustments
- 35:08 - tuning results and removing the circle for the target
- 36:05 - full screen final version!
- 36:24 - ending video - do da doo
- 36:40 - a few videos left! Come join us at Slack, examples, etc.
Lesson 08 - VID 28 - Noise (Simplex) and Generative Art
- 0:01 - video intro screen and music
- 0:12 - review of lessons so far - parallax, pages, sprites, etc.
- 0:40 - animating to SOUND! and grabbing a template
- 1:22 - loading in sound assets from assets folder
- 2:04 - passing assets and path into Frame call
- 2:17 - playing the asset
- 2:37 - we can now just use asset() rather than frame.asset()
- 2:59 - recording reference to sound in a const
- 3:19 - CreateJS SoundInstance to control sound after making
- 5:56 - playing the sound in the Browser
- 4:14 - changing circle sizes based on the frequency of sound!
- 4:46 - animate anything to sound - taught lip animation in China...
- 5:24 - making the SoundWave object!
- 5:36 - sound has frequencies, description... base, mid, treble
- 6:24 - setting parameters of SoundWave...
- 6:31 - microphone discussion - animate to live sounds for lightshows!
- 7:15 - adding a ready event for when the object is ready (sneezes!)
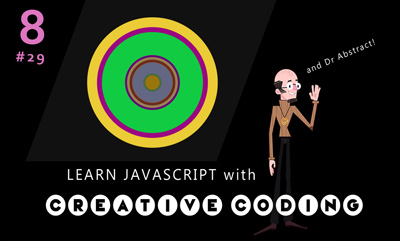
- 8:26 - making the circles once ready - and move to black background
- 9:24 - loop through soundWave.num and make circles
- 10:15 - dimensions come later when radius is set with sound
- 10:20 - randomizing the colors with ZIM VEE (Pick) array value
- 10:45 - discussion about how to randomly pick with raw JS
- 11:11 - what is a ZIM VEE value - and why is it called that?
- 12:13 - adding circles to container and container discussion!
- 13:26 - needing a stage.update() and viewing circles
- 13:37 - fanning out the circles with a move based on i - the iterator
- 14:34 - container dimensions demonstration and conversion...
- 15:47 - making radius of circles equal to the frequency of the sound
- 16:14 - adding a Ticker to animate circles based on sound data
- 16:35 - getting the soundWave data with calculate method
- 16:55 - data is array that has frequencies - and tweaking...
- 17:51 - viewing the data in the console F12
- 18:42 - logging to the console in a Ticker can bog the app
- 19:06 - loop through circles and set radius to match data
- 20:15 - viewing the results in the Browser
- 20:41 - reducing the size by multiplying the data by half (or some factor)
- 21:16 - beautiful result
- 21:45 - setting the blendMode ble() to see how many circles there are!
- 22:27 - startling results!
- 22:53 - reducing the number of circles to 10
- 23:11 - the result of reduced number of circles with difference blendMode
- 23:54 - discussion of making art with sound
- 24:08 - conclusion and view of standing in circles with mic input!
- 24:43 - come join us on Slack! Tell your friends, come code with us!
Lesson 08 - VID 29 - Animating to Sound Frequencies

- 0:01 - video intro screen and music
- 0:12 - last lesson! More to experience and to do with JS and the Canvas
- 0:30 - guessing game for last topic - looking at examples...
- 0:47 - pinball with sparks
- 1:05 - ice cream with bubble bling
- 1:16 - rocket with jet tail
- 1:43 - spark with fuse
- 1:58 - emitter following a mouse for line art!
- 2:28 - the mini-emitter site! With emitter trails menu
- 2:50 - fire... like the tail of the spaceship
- 3:13 - wiggling a sink... and snow falling (vertical emitter)
- 3:54 - emitting shapes again with a sink... like a gravity well
- 4:22 - making fireworks! Particle and line versions
- 4:49 - drawing lines that look like an atom!
- 5:14 - code example of a recent exercise app
- 5:35 - having a look at some emitter parameters
- 6:34 - starting paused and spurting...
- 7:14 - viewing the Flexercise app
- 8:58 - quick view of emitter in the app
- 9:13 - review of the ZIM Skool lessons at https://zimjs.com/skool
- 11:13 - grabbing the minimal template and starting our code
- 11:59 - making an Emitter - same as all the other classes and objects!
- 12:50 - viewing the default Emitter - lesson over... hahaha
- 13:10 - things we can do with the emitter... MotionController, etc.
- 13:49 - the plan... any where we click, run the emitter!
- 13:59 - reference with a const... JavaScript basics review...
- 14:37 - review of chaining...
- 15:35 - starting paused - and review of configuration object as parameter
- 16:28 - parameter discussion, defaults using undefined, etc.
- 18:05 - clicking to show the emitter - mousedown versus stagemousedown
- 18:44 - discussion of CreateJS with many thanks!
- 19:33 - review of functions, arrow functions, function literals
- 21:26 - putting the emitter and the same location of the mouse
- 21:44 - review of the event object (e)
- 22:20 - e.stageX and e.stageY - we no longer use due to Retina conflict
- 23:00 - use frame.mouseX and frame.mouseY instead
- 23:24 - using x and y property to set the position of the object
- 24:04 - centerReg adjustment... and discussion
- 24:49 - the loc() method - shorter and can chain
- 26:09 - spurting the emitter!
- 26:18 - discussion of statements... use ; at end of chaining
- 27:00 - clicking to show emitter in Browser
- 27:23 - setting the background color to black and trying!
- 28:12 - indenting our code
- 29:29 - adjusting the emitter parameters - checking in the Docs!
- 32:18 - emitting rectangles - and centerReg waffling...
- 33:18 - bug! bug! forgot Rectangle has width and height parameters...
- 33:42 - debugging example - simplify... or go back to where it worked
- 35:35 - seeing the centerReg rectangle - boo - and solution {add:false}
- 39:24 - randomizing the color as we make the rectangle
- 39:56 - randomizing the objects we are emitting using ZIM VEE
- 40:34 - emitting squiggles too (for the first time)
- 41:43 - viewing the squiggle emitting!
- 42:08 - adjusting gravity to go up - and discussion of force
- 42:50 - a little force (can also set angle range of force)
- 43:03 - wow, building is wonderful! Yay - to all these settings!
- 43:17 - not shrinking with boolean false
- 43:50 - setting random rotation or random any property!
- 44:03 - final viewing of weird squiggly
- 44:18 - coding in JavaScript on Canvas versus not on Canvas...
- 44:42 - the canvas is one big image that we dynamically change
- 44:52 - painting on the canvas with our creativity!
- 45:11 - closing video for the last time - da da dee doo...
- 45:25 - other videos - ZIM Explore, Code in Five Minutes with ZIM
- 45:50 - thank you, please share, join us at https://zimjs.com/slack
Lesson 08 - VID 30 - Particle Emitters - Fire, Flames, Fireworks

- 0:12 - new module on data with PHP and mySQLi
- 0:22 - form on the canvas demonstration
- 0:33 - quick view of database
- 0:44 - viewing things on Canvas and HTML DOM - same techniques
- 0:56 - what is data? Fully understand this!
- 1:30 - meta data - id, property, variable, name, label
- 2:00 - combination of data and meta data is information
- 2:27 - information to FORM circle
- 2:39 - information informs us - data in an HMTL FORM...
- 2:56 - information in a visual way vs text information
- 3:22 - looking into the code - template and focus on data
- 4:00 - two sets to all the pages - the second with detailed comments
- 5:17 - the information to form a circle = meta data + data
- 6:26 - "both sides need each other"
- 6:58 - storing information - example without storing
- 7:45 - want to remember the information
- 8:08 - BINDING information to localStorage - data on user computer
- 9:54 - properties we want to remember - x, y, level
- 11:03 - localStorage discussion - remembering on local computers
- 12:00 - wanting to share with others? a Database!!
- 12:27 - looking ahead to doing HTML and Canvas forms
- 12:46 - exit video and... exit!
Lesson 09 - VID 31 - Data and Information - localStorage
- 0:13 - summary of module - canvas, HTML DOM, PHP, MySQLi
- 0:30 - canvas excitement
- 0:48 - HTML form - design inspired from canvas
- 1:30 - submitting the form
- 1:57 - form results... information from form to database to results
- 2:15 - showing table of top ten per color chosen
- 2:35 - GET format on the command line - handy for debugging
- 3:29 - POST versus GET - most forms are POST
- 4:03 - view of the Database Table and future plan with PHP
- 4:50 - looking through the HTML page
- 5:10 - styles
- 5:30 - script - sample of form validation and color change
- 5:56 - the form with action to PHP
- 6:02 - error running PHP locally - ew!
- 6:54 - run the PHP on a server! And AJAX security mention
- 7:26 - looking through the form fields - input fields
- 8:10 - the name parameter is IMPORTANT - to receive data
- 9:05 - custom colors not working in Firefox (works in Chrome)
- 9:35 - intro to JavaScript in example
- 10:23 - length of commands on DOM!!!
- 10:48 - ZIM on canvas is HALF the size of the DOM form code
- 12:10 - changing the color of the background
- 12:25 - clicking the submit - popup and stop form if no name
- 14:37 - making an event function to close the popup
- 15:35 - conclusion for the front end and future videos
- 16:15 - ending video and ending!
Lesson 09 - VID 32 - HTML Form

- 0:11 - data from Canvas or HTML DOM to the server summary
- 0:38 - demonstration of Canvas - same back end for both canvas and HTML DOM form
- 1:00 - the Database! - cPannel, and view through examples
- 1:48 - tables and database discussion / when to use which
- 2:37 - a table is where we hold the data with fields/columns and records/rows
- 3:24 - phpMyAdmin and types of fields text, int, etc.
- 3:44 - key field - primary, unique and auto increment
- 4:16 - browsing the table, edit, insert, reports, etc.
- 4:51 - making our table with new table link
- 5:26 - adding the field names - the same as the field names in the form
- 6:25 - setting auto increment and primary key
- 6:55 - insert and note that SQL statements are shown
- 7:25 - yay we have our table - and what's next, PHP to table!
- 7:44 - closing video - creative coding... ya!
Lesson 09 - VID 33 - Database Table
- 0:12 - review and looking forward... all the way to the server and back!
- 0:23 - summary of last lessons - data, html form, database setup
- 0:40 - canvas demonstration - note the backend system is the same for Canvas or DOM
- 1:08 - sumbitting the HTML DOM form - and the results
- 1:38 - reminder about the command line and adjusting results
- 1:49 - looking at the code! HTML review of the field names in the name parameters
- 2:17 - PHP! An overview of the PHP page - HTML part, adding and selecting to database
- 2:53 - zooming in and PHP basics - echo to print or view
- 3:35 - uploading the file to the server (from editor or FTP client)
- 4:05 - ERROR! a blank white page
- 4:22 - missing a semicolon ; Lesson 1, PHP needs the semicolon
- 4:28 - ERROR! what happened! Lesson 2, upload the file!!
- 4:55 - adding style to our result - and we upload!
- 4:17 - HELLO WORLD!
- 5:30 - variables with $
- 6:07 - embedding PHP variables right in a string
- 6:27 - collecting the information from the command line $_GET[]
- 7:48 - making sure variable exists with isset() and ternary operator ? :
- 9:29 - connecting to the database with PHP and mysqli() class
- 11:10 - collecting the data with the same names as form fields and table fields
- 11:33 - SQL string statement for INSERT into table13
- 13:05 - any value coming from client (front end) use a ? in mysqli
- 13:52 - binding the values from the front end into the ?
- 14:16 - making a mysqli statement for us to operate on
- 15:05 - preparing the statement with the query
- 15:20 - binding the parameters with information about the variables
- 15:40 - discussion of input variables - tainted, etc.
- 16:00 - executing the statement and closing it!
- 16:18 - information will go into the database - does it work?
- 16:50 - maybe the data is always put at the end of the table
- 17:44 - browse to refresh the table!
- 18:39 - woot woo darth zoo! Summary and selecting coming soon!
Lesson 09 - VID 34 - PHP MySQLi INSERT

- 0:14 - summary of earlier videos - data, php, mysql
- 0:45 - canvas form demo and future saving shapes
- 1:08 - an HTML form with results - data being sent with GET - results discussion
- 1:50 - Retrieving information from database!
- 2:09 - PHP - review... HTML in PHP, connection and INSERT with binding to variables
- 3:23 - Query to find out what is in the database table
- 3:28 - binding because color comes from client - so need ? and binding
- 3:48 - plan to loop through results and make the HTML table!
- 4:26 - the SELECT query - selecting which fields we want from the table
- 5:42 - getting all the records
- 6:24 - WHERE clause - limiting the data to the same color as we entered
- 7:14 - ORDER BY, DESC, LIMIT, etc. SQL functionality talk about DELETE and UPDATE
- 8:34 - making the mysqli statement and the binding like before
- 9:10 - receiving what comes back from the database - look at the commented version
- 9:52 - binding the results into our own names for the fields
- 10:20 - looping through the results - starting with making an HTML table
- 11:17 - fetch() get one row at a time and populate our variables
- 12:00 - making the table rows and cells
- 12:37 - reporting an error and conclusion!
- 13:42 - a look to the future with AJAX to send and get data without reloading the page
- 14:00 - final dance video!
Lesson 09 - VID 35 - MySQLi SELECT

- 0:11 - review of data lessons
- 0:38 - submitting form without a results page?
- 0:51 - AJAX - asyncronous data
- 1:03 - JSON and JSONp discussion
- 1:23 - HTML form and reminder that backend is the same
- 1:34 - popping the message bar and testing
- 1:48 - not loading a results page versus loading a results page
- 2:08 - review of the HTML code - styles, scripts, form fields, message div
- 3:00 - zoom in zoom out - the JavaScript!
- 3:40 - event object stopping submit
- 3:47 - form tag has no parameters - we use AJAX
- 4:12 - pop up function
- 5:23 - AJAX - the remote AJAX imported class - scroll up scroll down!
- 7:08 - new AJAX object request type POST
- 8:29 - sending information in CGI format with encodeURI()
- 12:16 - using ES6 templating with back tick / tilt
- 15:00 - sending the information with AJAX
- 15:30 - callback function to receive data back from server
- 16:20 - looking at the result from the server
- 16:50 - AJAX review
- 17:22 - PHP page - no HTML needed because we are not making results page
- 18:50 - connect to database, collect variables in POST
- 18:40 - INSERT into the table with bound variables for mysqli protection!
- 19:30 - echo the result - no XML needed, or could use JSON
- 20:12 - last test to see if data enters!
- 20:28 - data does not always get added to end ;-)
- 21:07 - exciting end to video and look forward to Canvas and JSONp
- 21:35 - closing dance video
Lesson 09 - VID 36 - AJAX
- 0:10 - data videos so far
- 0:35 - data on the Canvas with ZIM
- 0:44 - demonstration of remembering shape locations
- 1:05 - sharing the data with other computers
- 1:42 - not multiuser - that is sockets (ZIM has sockets in code section)
- 2:20 - example of sharing data - Tower Talk example
- 3:00 - the love shack!
- 3:21 - into the code for the shapes
- 3:40 - slight review of binding with localStorage
- 4:03 - what is different when storing to server - delayed response
- 4:29 - callback functions
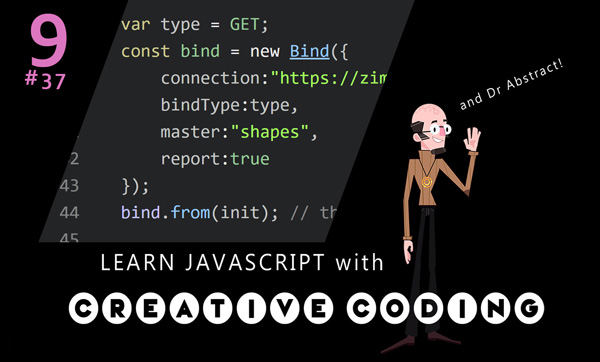
- 4:41 - the Bind object and discussion of GET and POST
- 5:24 - discussion of testing on server and using a local server
- 5:47 - Bind and the from() call to get the starting data for the shapes
- 6:18 - callback options and functions discussion
- 7:09 - binding to place the circle at the start information
- 7:24 - binding id discussion
- 8:26 - GET as a constant is just the string "get"
- 9:15 - GET and POST review - GET to create and test - POST final
- 10:05 - preview of the provided files including comment files
- 10:47 - adding method (GET or POST) to the URL and why!
- 12:35 - master parameter for Bind - use as general id, etc.
- 13:54 - report parameter for Bind - and examples!
- 15:09 - Bind from() details
- 15:36 - reporting historical data with data.report()
- 17:37 - binding the shapes and properties - see older videos
- 18:19 - code inside from call is same as localStorage code!
- 19:10 - put video on pause and get a cookie!
- 19:27 - PHP side! Quick review
- 19:49 - content-type with ZIM async() sending via GET
- 20:35 - collecting the type using GET (always)
- 21:01 - collect variables as either $_GET or $_POST
- 21:55 - variables - master, and command discussion (to, from, etc)
- 22:23 - the to command and error checking for master (the id)
- 22:42 - sending back information for GET or POST (ternary)
- 24:48 - Database table - JSON saving time - less fields!
- 25:19 - discussion of ID - not auto incrementing
- 25:40 - INSERT - the id and json from client use ? for binding
- 26:00 - either INSERT or UPDATE in one SQL command!
- 27:55 - MySQLi all the same as the HTML videos and Skool lesson 9
- 28:25 - returning a results to the client (success or error)
- 29:14 - from command - using callbackFROM() vs callbackTo()
- 29:45 - FROM query - just grab the JSON! Similar steps to HTML
- 30:27 - back in ZIM we collect the data that comes back
- 31:13 - bind.removeAll() to remove the data with DELETE query
- 31:40 - reports as we send data and example of error callback
- 33:44 - files are in a zip file and conclusion video
- 34:10 - come join us at https://forum.zimjs.com
Lesson 09 - VID 37 - BINDING

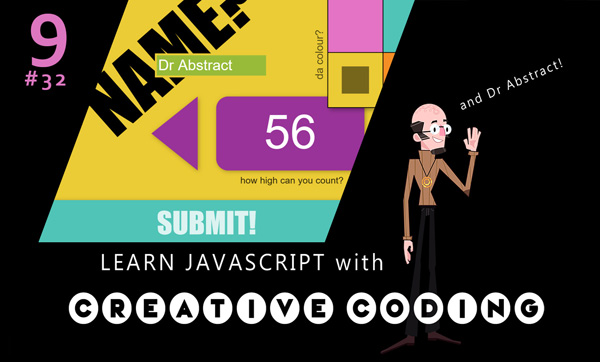
- 0:09 Dr Abstract counting to 123 in a Canvas Form!
- 0:35 review of videos
- 1:28 canvas code in ZIM template
- 1:56 Bind object
- 2:54 different than last video - just sending data
- 3:28 review of the form parts name, color, count, submit
- 3:58 the name field and wiggling the label
- 5:02 TextArea - trying out the placeholder - and TextArea issues
- 6:23 binding to TextArea .bind("name", "text"); id and properties
- 7:26 Emitter() sneak info about ZIM VEE (Pick) for ranges, random, etc.
- 8:57 Stepper() activates emitter
- 9:19 Bind options - how to target specific binds - objects, ids, to, from, etc.
- 11:00 ColorPicker
- 11:14 Button press! All the action - check for name and if none, pop Pane
- 11:49 bind.to() and bind.toLock() discussion (but not used here)
- 14:33 Tower Talk example with respect to locking records for sharing JSON storage
- 16:03 the filter! Adjust data before to data gets sent - or at a couple times in from()
- 18:27 filtering the color before sending - ZIM color
- 20:53 data.report() for saved data - not for data going through filter (long story)
- 24:22 callback function to show the results
- 25:35 Accessibility for the Canvas components - screen reader ready
- 26:20 PHP code - quick review and reminder of the commented files
- 28:15 collecting the data - just JSON in data!
- 28:44 json_decode() in PHP to turn string into PHP object
- 29:17 json_decode() to PHP Associative Array (not used in this case)
- 30:17 PHP Objects dash greater than instead of dot syntax
- 31:27 looking at the data and its information - ZIM Bind format
- 32:44 Database table - auto incrementing id, name, count, color fields
- 33:30 INSERT query and binding client data
- 34:35 storing separate data fields or storing single JSON object?
- 35:34 executing query and reporting back
- 36:36 Dr Abstact dancing - conclusion to data lesson!
- 36:56 Join us at https://zimjs.com/slack and https://zimjs.com/tower ciao!
Lesson 09 - VID 38 - CANVAS FORM

- 0:10 - launch of ZIM Base - https://zimjs.com/base/
- 0:37 - ZIM Base page for accessing Database with 1/3 the MySQLi
- 0:57 - intro ZIM Base and what it can do
- 1:38 - examples - HTML example form
- 2:15 - examples - ZIM shared shapes
- 3:14 - the Code - ZIM Base file and data connections you must set
- 4:45 - calling ZIM Base from the app PHP page
- 5:17 - getting variables with ZIM Base makeVars()
- 6:00 - inserting data with ZIM Base insert()
- 6:30 - ZIM Base uses MySQLi in the background
- 6:44 - affected_rows, errors, etc.
- 7:09 - selecting data with ZIM Base select()
- 7:50 - num_rows - and difference between num_rows and affected_rows
- 8:25 - looping through results with $result->assoc()
- 9:07 - using $result->array() to get field indexes
- 10:00 - using $result->record for one result (or $result->row for array)
- 10:49 - brief view through the HTML - traditional form
- 12:27 - viewing the commands - connection and variables
- 12:50 - INSERT
- 14:36 - INSERT OR UPDATE
- 17:00 - UPDATE
- 17:44 - affected_rows - 1(new), 2(updated), 0(repeat), -1(unsuccessful)
- 18:34 - SELECT - single record
- 22:19 - SELECT - multiple records
- 24:25 - DELETE
- 26:25 - QUERY - plain SQL
- 26:55 - REPLY
- 27:30 - LOCKING
- 27:50 - Canvas Example - shared shapes
- 28:15 - binding
- 28:42 - from() to get the server information
- 29:13 - binding the shapes with their properties
- 29:33 - to() send the changes to the server when shape changes
- 29:58 - sending and receiving specific information - we do not usually
- 31:05 - review of bind - and how simple it is!
- 32:23 - PHP for the shared shape - id discussion - ONE record ONE id
- 33:53 - TO - inserting the data to the table - $data automatically made
- 34:50 - review of insert or update
- 35:32 - error checking
- 35:42 - converted 100 pages with multiple SQL calls converted to ZIM Base
- 36:40 - FROM - getting the JSON from the table - send back $result->json
- 37:36 - Review of PHP process - just a few lines of code!
- 38:35 - ending video - calling Dr Abstract!
Lesson 09 - VID 39 - BASE
- 0:11 - last Data video!
- 0:32 - review of last video on ZIM Base
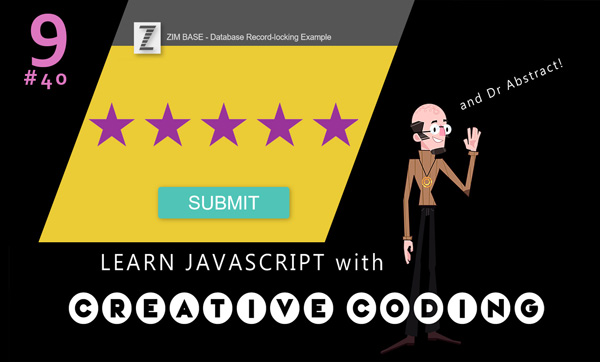
- 1:18 - example for this video - star rating!
- 2:08 - looking that the HTML for the example
- 2:42 - ZIM Explore on this code:ZIM Explore Star Example
- 3:10 - has the user voted? Bind to localStorage
- 6:16 - default bind when there are TWO binds
- 7:15 - binding the rating data
- 8:00 - processing data in JavaScript rather than in PHP or SQL
- 9:33 - record locking to ensure only one person changing data
- 10:25 - solution 1. - steps: call from, change data then call to
- 13:22 - solution 2. - toLock - handles all the steps!
- 14:02 - updating data in filter in the "from" stage
- 16:12 - PHP for the stars - single record with JSON id, lockid, json
- 17:12 - random lockid
- 18:15 - FROM comes first to get latest data
- 18:50 - locking the record on the from
- 19:35 - how locking works in PHP
- 20:15 - sending results back
- 20:45 - inserting vote and clearing the lockid
- 21:55 - review of PHP
- 22:19 - wrap up of ZIM Base and data
- 23:09 - Ending video - Pragma calling Dr Abstract with symbol of Nodism
- 23:18 - Thank you! Hope vids help! Please share - https://zimjs.com/slack
Lesson 09 - VID 40 - RECORD LOCKING